webOS Open Source Edition (OSE) provides an emulator that enables you to develop the webOS application and service on a virtual environment. With the emulator, you can test major features of webOS OSE on your PC without the need of a physical device such as Raspberry Pi.
The emulator runs as a virtual machine on VirtualBox and supports host platforms including Ubuntu Linux, macOS, and Windows.
Caution
The VirtualBox-based emulator (64-bit) is supported by webOS OSE 2.14.0 or higher.
Make sure that Intel® Virtualization Technology (Intel® VT) is enabled in the host PC.
Key Features
Key characteristics of the emulator are as follows:
VirtualBox-based emulator
Emulates major features of webOS OSE platform on PC without Raspberry Pi target device
Provides graphics functionality with host PC’s GPU H/W acceleration
Supports webOS OSE CLI tool for application and service development
Caution The emulator does not support Apple Silicon Mac.
Windows
Windows 7 (64-bit)
Windows 10 (64-bit)
Installing VirtualBox
If you don’t have Oracle VM VirtualBox already installed on your computer, you need to install it.
Ubuntu Linux
You can either download a package (.deb) file and install the package, or use the apt-get command to install Oracle VM VirtualBox from an online package repository (recommended).
Installing a Package
Download the appropriate package from VirtualBox for Linux page and install the package.
Download the binary package specified as “OS X hosts” from VirtualBox Download page and install it on your computer.
Windows
Download the binary package specified as “Windows hosts” from VirtualBox Download page and install it on your computer.
Setting the path on Windows
On Windows, the path to the VirtualBox installation directory is not automatically added to the path during installation. We strongly recommend you set the path manually for later steps, using one of the commands below on a command shell.
Setting the PATH variable in the system environment (run the shell as Administrator)
Make sure you set up the build for the emulator at the configuration step.
After the build is completed, check that the resulting image (webos-image-qemux86-64-master-*.wic.vmdk.gz) has been created properly.
Setting Up the Virtual Machine in VirtualBox
You can create and set up a VirtualBox virtual machine from the GUI or from the command line.
Using the GUI
Note The screenshots below have been captured from Oracle VM VirtualBox v6.0.14 on Windows 10. If you are using a different version of the program or on a different host operating system, you might notice minor differences in the position or name of GUI elements.
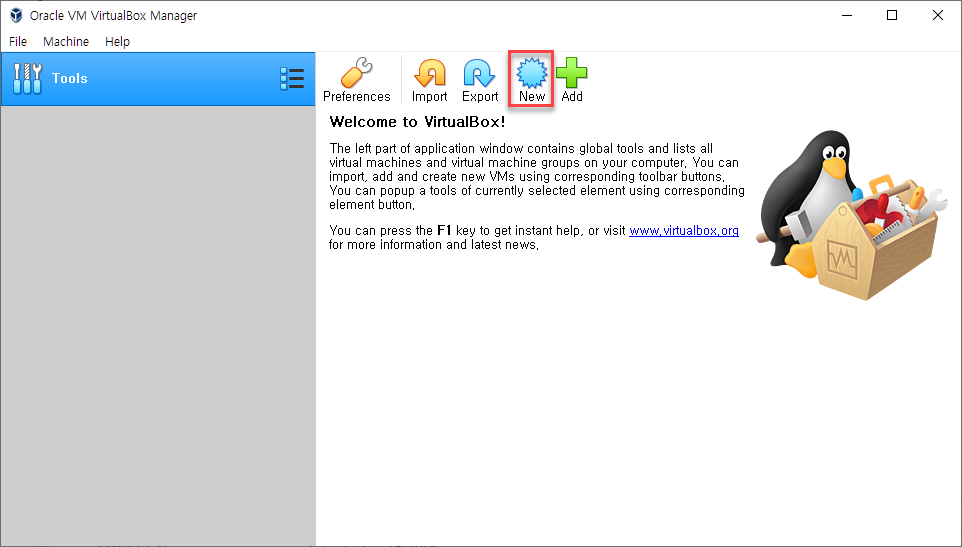
Start the Oracle VM VirtualBox application. You can launch the program from the application menu or by typing virtualbox in a command shell.
Ubuntu Linux only You can ignore the “Error opening file for reading: Permission denied” error that might appear when launching the VirtualBox GUI from the shell.
First, you need to create a webos-image virtual machine. To create a webos-image virtual machine, click New on the icon toolbar.
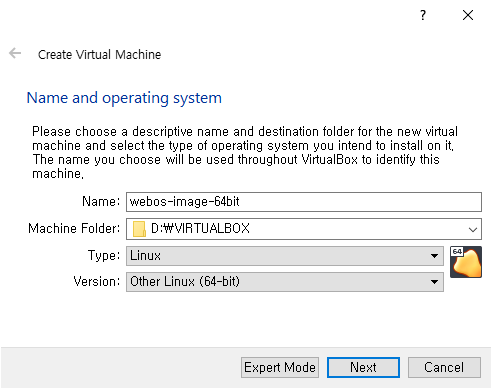
In the Create Virtual Machine wizard that appears, input the general information of the virtual machine.
In the Name box, type webos-image.
From the Type list, select Linux.
From the Version list, select Other Linux (64-bit).
Click Next.
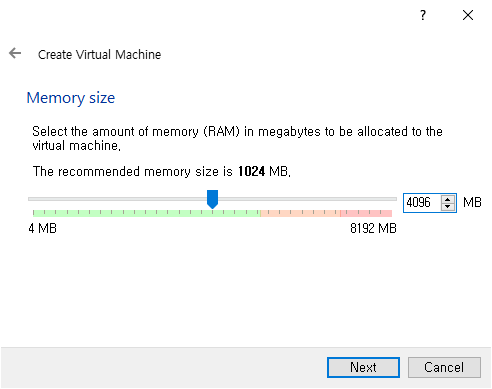
In the Memory size section, set the amount of memory you wish to allocate to the webos-image virtual machine.
We recommend that you allocate at least 4 GB (4096 MB) of memory for stable performance. It is also recommended that the memory configured for the virtual machine should be less than 50% of the system memory.
Type the amount of memory in the box to the right of the slider, and click Next.
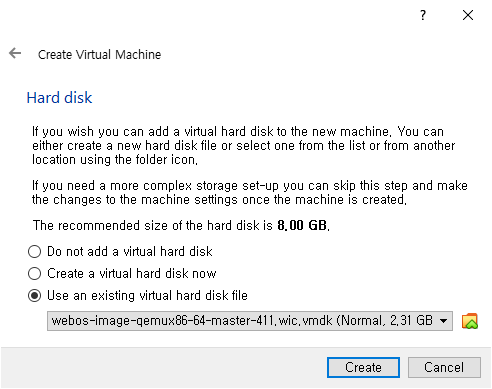
In the Hard disk section, select Use an existing virtual hard disk file and click icon.
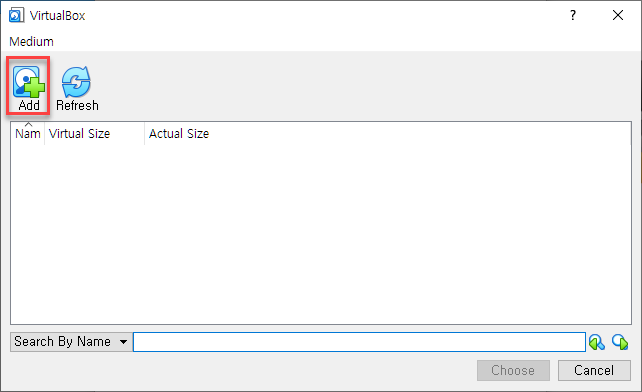
Click the Add button and locate the webOS image (.vmdk) on your computer that you wish to install on the virtual machine.
Click Create.
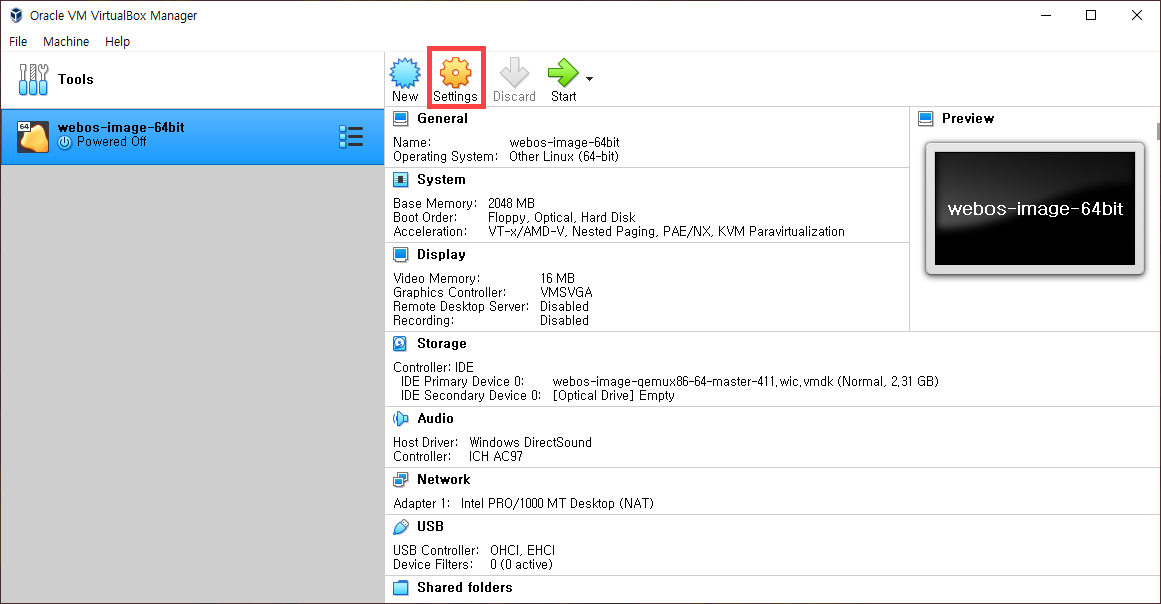
Oracle VM VirtualBox Manager will return to the main screen and display the details of the created virtual machine.
Next, you need to modify the system settings of webos-image virtual machine. On the icon toolbar, click Settings.
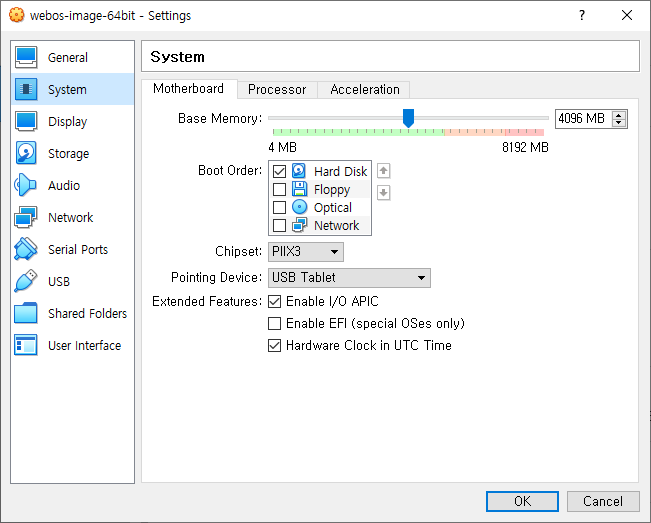
In the Settings dialog box that appears, click System in the navigation bar.
The Motherboard category will be displayed.
In Boot Order, clear checkboxes on Floppy and Optical.
In Pointing Device, select USB Tablet.
In Extended Features, select Enable I/O APIC.
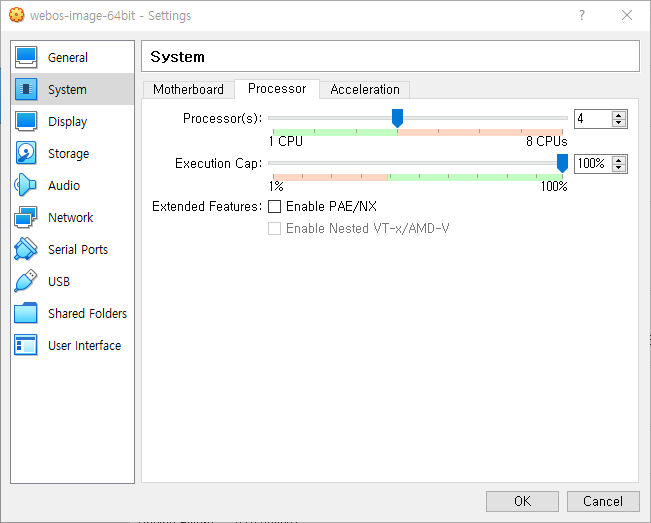
Click the Processor tab.
The Processor section will be displayed.
You need to specify the number of processors you want for your virtual machine. You can specify 1, but we recommend you set it to a higher value (up to 4), depending on your system capabilities.
Type the number of processors you wish to allocate, in the box to the right of the Processor(s) slider.
Clear a checkbox on Enable PAE/NX.
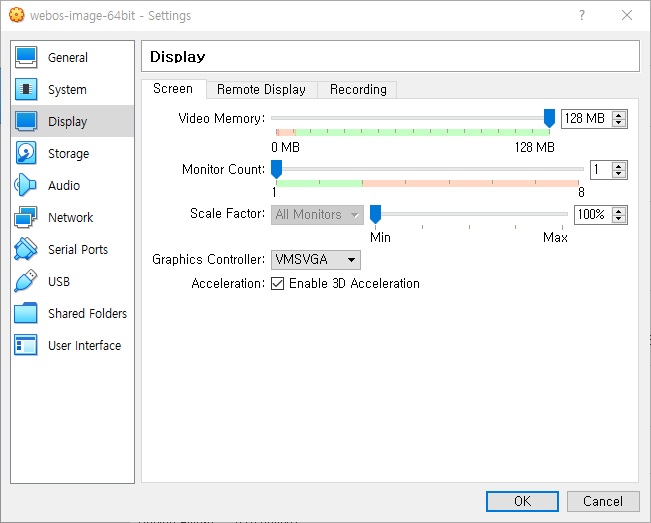
On the navigation bar, click Display.
The Display section will be displayed.
In Video Memory, set the amount of video memory you wish to allocate to the webos-image virtual machine. You can allocate up to 128 MB of memory.
In Monitor Count, set the count of monitor to 1 or 2. webOS OSE supports up to two monitors.
From the Graphics Controller list, select VMSVGA.
In Acceleration, ensure that Enable 3D Acceleration option is selected.
On the navigation bar, click Audio.
The Audio section will be displayed.
Ensure that Enable Audio is selected.
Configure Host Audio Driver as follows, depending on your operating system:
On Ubuntu Linux, select PulseAudio.
On macOS, select CoreAudio.
On Windows, select Windows DirectSound.
From the Audio Controller list, select ICH AC97.
In Extended Features, select Enable Audio Output and Enable Audio Input.
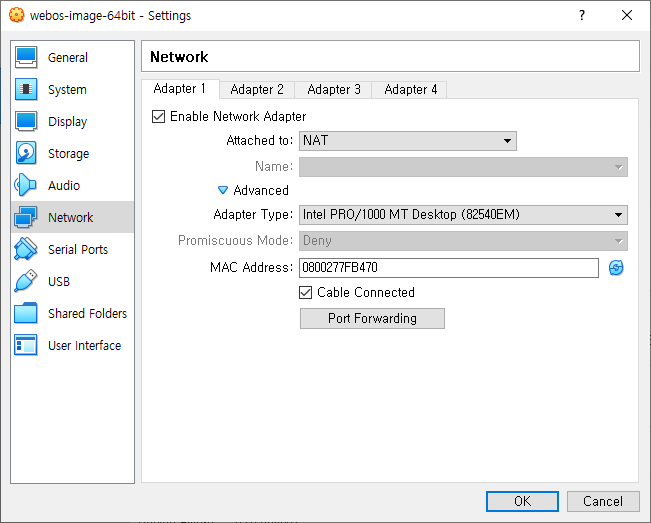
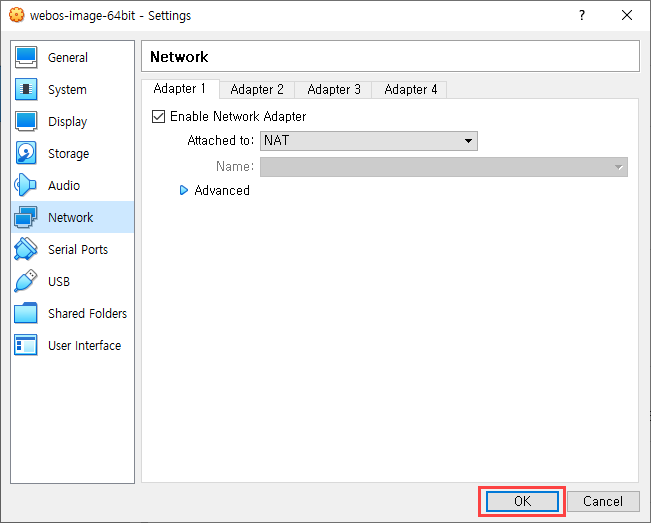
On the navigation bar, click Network.
The Network section will be displayed. Ensure that the Adapter 1 tab is selected.
From the Adapter 1 tab, click Advanced. You will see advanced network settings.
From the Adapter Type list, select Intel PRO/1000 MT Desktop (82540EM).
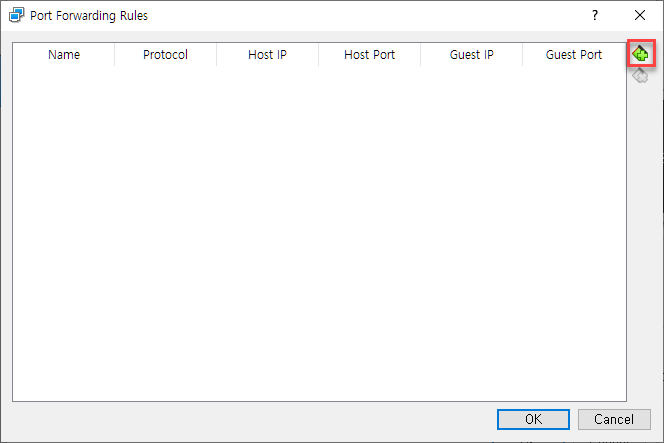
Next, click Port Forwarding.
The Port Forwarding Rules dialog box will show up.
You need to set up port forwarding rules to connect through SSH and Web Inspector. To add port forwarding rules, click .
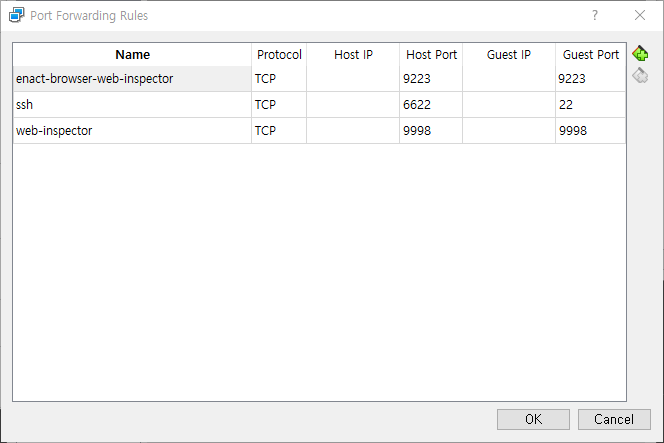
You will see the rules table. Set the rules by typing the following values in the appropriate column:
Name
Protocol
Host Port
Guest Port
ssh
TCP
6622
22
web-inspector
TCP
9998
9998
enact-browser-web-inspector
TCP
9223
9223
Click OK. You will return to the Adapter 1 section.
Click OK.
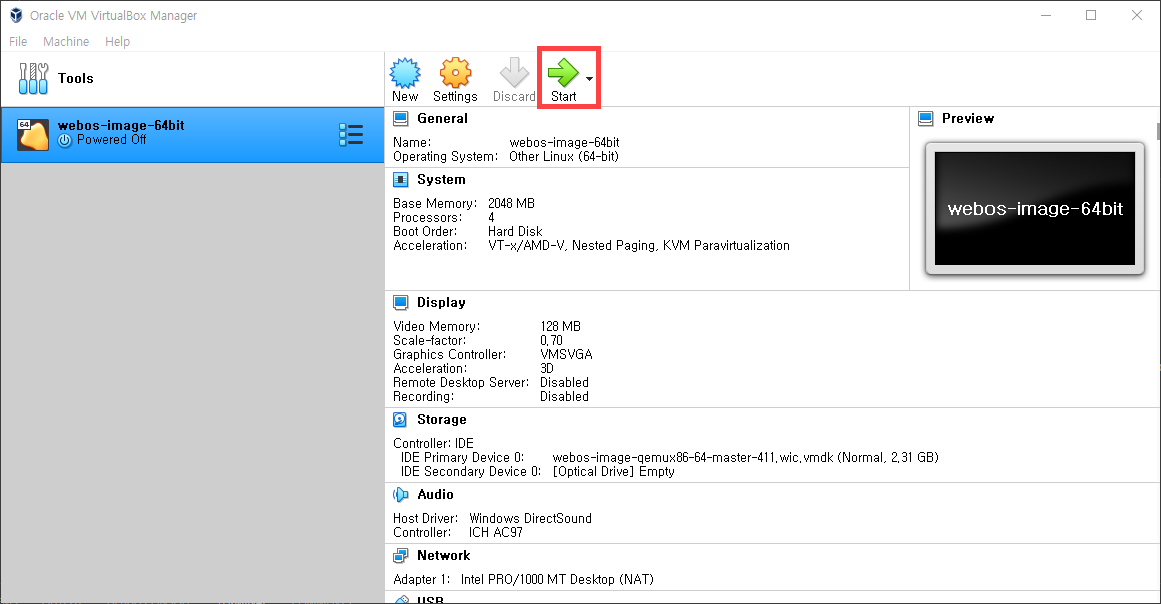
Oracle VM VirtualBox Manager will return to the main screen and display the details of the virtual machine with updated information.
Your virtual machine is ready for use. To start the virtual machine, ensure that the virtual machine you wish to run is selected. On the icon toolbar, click Start.
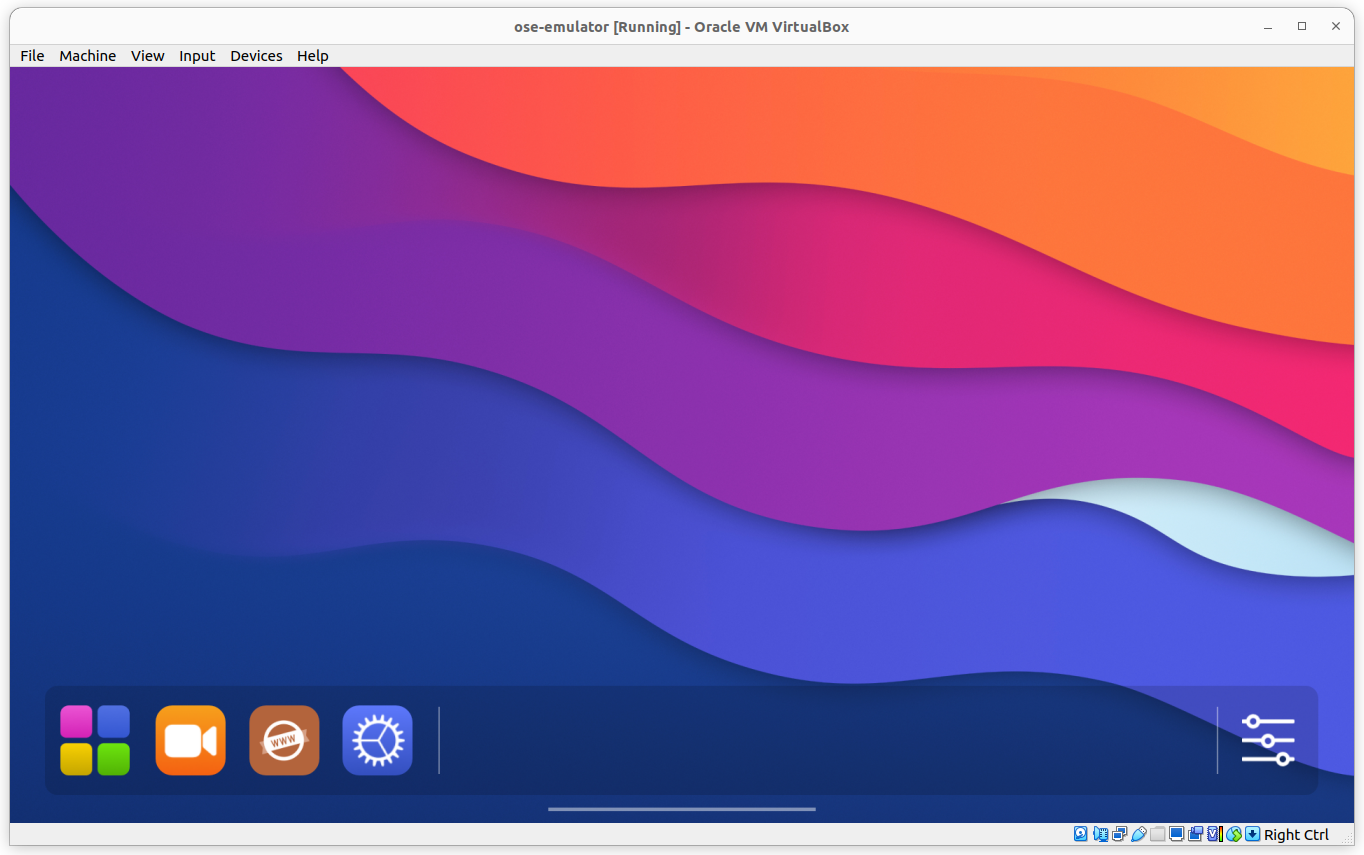
Oracle VM VirtualBox Manager will display the webos-image virtual machine window.
It will display the VirtualBox - Information dialog box. Click OK.
Next you will see another VirtualBox - Information dialog box, informing you about how the mouse capture has been set up. Click OK.
You can now begin using the webos-image virtual machine.
Note
The display resolution of webos-image defaults to 1920x1080. If it is too big to be displayed on the monitor, you can adjust the scale with the following command.
To create a virtual machine from the command line, VBoxManage is used.
The following example shows commands used to create and set up a webos-image virtual machine for a Ubuntu Linux host with a similar setting of the GUI example above. Type the following commands sequentially in a command shell:
A command-line example to create a virtual machine on Ubuntu Linux
vboxmanage createvm --ostype Linux_64 --register --name webos-image
vboxmanage modifyvm webos-image --memory 4096 --vram 128 --ioapic on --cpus 2vboxmanage modifyvm webos-image --graphicscontroller vmsvga
vboxmanage modifyvm webos-image --accelerate3d on
vboxmanage modifyvm webos-image --audio pulse --audioout on --audioin on
vboxmanage modifyvm webos-image --nic1 nat --nictype1 82540EM --natpf1 ssh,tcp,,6622,,22
vboxmanage modifyvm webos-image --natpf1 web-inspector,tcp,,9998,,9998
vboxmanage modifyvm webos-image --natpf1 enact-browser-web-inspector,tcp,,9223,,9999
vboxmanage modifyvm webos-image --mouse usbtablet
vboxmanage modifyvm webos-image --uart1 0x3f8 4 --uartmode1 file /dev/null
vboxmanage storagectl webos-image --add ide --name webos-image
# Only when you want to set 2 monitors, default is 1vboxmanage modifyvm webos-image --monitorcount 2# To adjust the scale of display resolutionvboxmanage setextradata webos-image GUI/ScaleFactor <scale_factor>
Note
For audio setup on other host operating systems, use the following commands:
macOS: vboxmanage modifyvm webos-image --audio coreaudio --audioout on --audioin on
Windows: vboxmanage modifyvm webos-image --audio dsound --audioout on --audioin on
For Windows, make sure you pass null instead of /dev/null to the serial port setup.
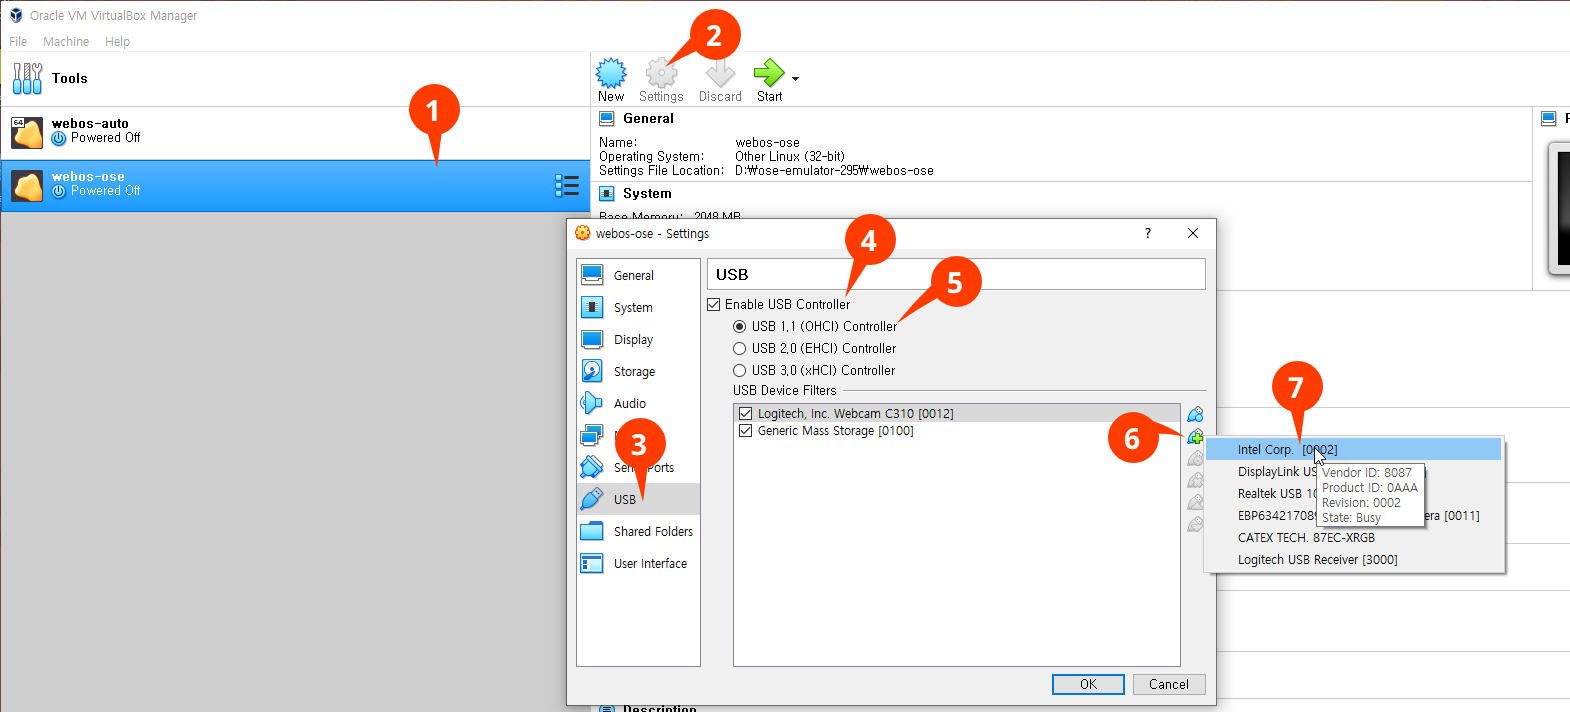
To add the device, before launching the virtual machine on VirtualBox, do the following:
Select the virtual machine (from the left-hand side).
Click the settings icon to display the settings dialog.
Click USB.
Select the Enable USB Controller checkbox.
Select the USB 1.1 (OHCI) Controller option.
Click the + icon (on the right-hand side) to get a list of USB devices.
Select the required device (Bluetooth dongle, USB storage device, or USB webcam).
The device is added to the USB Device Filters field.
Click OK.
Now, launch the virtual machine and after it starts, from the Devices menu, select the required USB device(s).
Updating the Image on the Virtual Machine
The following describes the steps to update the emulator image on the previously created virtual machine.
Prepare a new emulator image by building webOS OSE for emulator.
Start Oracle VM VirtualBox on your computer. From the virtual machine list, select the virtual machine whose image you wish to update. From the icon toolbar, click Settings.
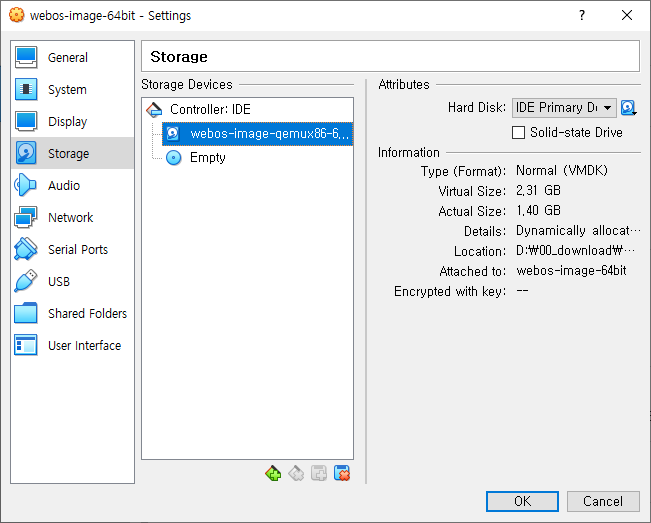
On the navigation bar of the Settings dialog box, click Storage. From the Controller: IDE list, select the build image that you wish to update.
On the Attributes section, click icon. From the displayed menu, select Choose Virtual Hard Disk File….
You will see the Please choose a virtual hard disk file dialog box. Locate the new webOS image you wish to install from your computer. Select the appropriate emulator image file (.vmdk), and click Open.
The Storage section will show up. Click OK.
Now your virtual machine has been updated and you are ready to use the updated virtual machine.
Connecting to the Emulator
On the host machine, you can connect to the emulator in various ways.
Connect from the Shell
Ubuntu Linux/macOS
The best way to get a shell into the emulator is with SSH. On the command shell, type the following command with the host port number (6622) configured for ssh in the port forwarding rules during the setup process:
ssh -p 6622 root@localhost
To avoid error messages about the host changing every time you change emulator images, you can add the following flags to ssh (or create an alias in your .bashrc to do this for you):
Use a SSH client (for example, Putty) to connect to the emulator using SSH protocol.
Connect from the Web Browser
To connect to the emulator using Web Inspector, access localhost:<PortNumber> on a web browser (for example, Chrome). The port number must match the value configured for web-inspector (for example, 9998) in the port forwarding rules during the setup process.
Connect from the Serial Ports
Go Setting in Virtualbox Emulator machine, select “Serial Ports” and then,
check "Enable Serial Port"
Serial Ports : Port 1
Port Number : COM1
Port Mode : Host Pipe
Connect to existing pipe/socket : UNCHECKED
Path/Address: /tmp/vbox (on Ubuntu/macOS) or \\.\pipe\com1 (on Windows)
Now, set terminal progrom in Host PC. For example, Minicom in Ubuntu host PC or macOS.
$ sudo apt install minicom
$ sudo minicom -s -c on
Serial port setup
Serial Device : unix#/tmp/vbox
Hardware Control : No
Software Control : No
Save setup as dfl
Exit
Ctrl-a q
$ minicom
For Windows PC, please use terminal program (such as puTTY) and set
type -> serial
speed -> 115200
serial line -> \\.\pipe\com1
Finally start VirtualBox emulator and then you can see serial outputs.
Trouble Shooting
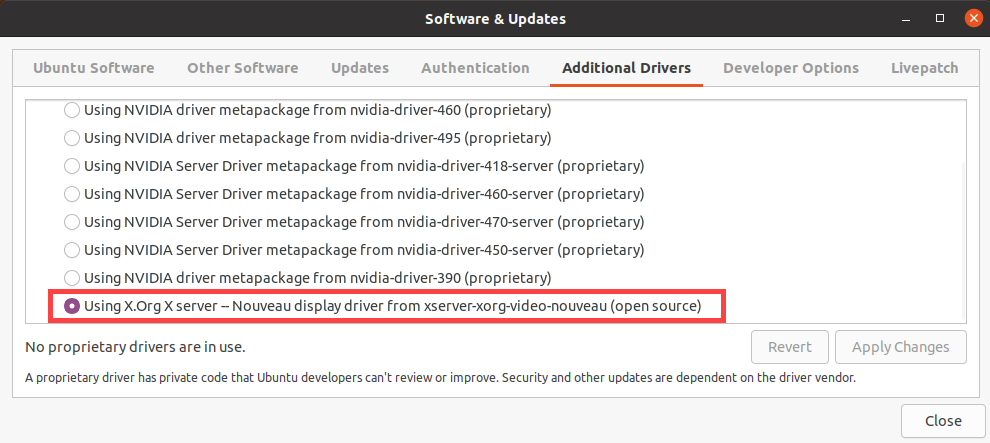
Kernel Module Re-compiling When VirtualBox Is Not Work Properly in Ubuntu
If you reinstall VirtualBox or upgrade Ubuntu packages, these might cause unexpected errors on VirtualBox. In this case, you should recompile host side kernel modules related to VirtualBox:
 icon.
icon.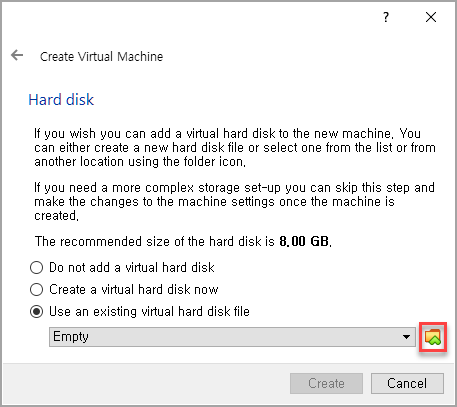

 .
.
 icon. From the displayed menu, select Choose Virtual Hard Disk File….