Note
In this tutorial, we use the CMake to build the project. But you can use any other tools for the build.
In this tutorial, we use the CMake to build the project. But you can use any other tools for the build.
External native apps are 3rd party native apps that must be installed on the webOS target device.
This page describes the steps to develop an external native app using Sample Code Repository and CLI. For detailed information on the CLI commands used in this tutorial, see CLI commands.
Developing an external native app requires the following steps:
Make sure you have completed the steps in Native Development Kit Setup.
Download the sample repository, and move into samples/native-apps/external/com.sample.waylandegl directory.
$ git clone https://github.com/webosose/samples
$ cd samples/native-apps/external/com.sample.waylandegl
The directory structure of com.sample.waylandegl must be as follows:
native-apps/external/com.sample.waylandegl/
├── src/
│   └── wayland_egl.c
├── appinfo.json
├── CMakeLists.txt
├── icon.png
└── README.md
Design and implement the source code for native app.
The sample codes will display a yellow screen on your target device. In this section, we will briefly explain webOS specific parts in src/wayland_egl.c.
| wayland_egl.c | ||
|---|---|---|
|
A brief explanation of the above file:
wayland-webos-shell-client-protocol.h header file which has wl_webos_shell and wl_webos_shell_surface structure.wl_webos_shell and wl_webos_shell_surface structure which are the webOS specific extension of wl_shell and wl_shell_surface.1, the sample app will be displayed on a secondary display. To set up the secondary display, see Dual-Display Setup.For detailed information on the webOS-specific protocol extension, visit webOS OSE GitHub.
This section describes how to prepare the configuration files required to build and test the native app.
Apps are required to have metadata before they can be packaged. This metadata is stored in a file called appinfo.json, which is used by the webOS device to identify the app, its icon, and other information that is needed to launch the app.
| appinfo.json | ||
|---|---|---|
|
A brief explanation of the above file:
For more details, see appinfo.json.
CMakeLists.txt file is used by CMake to generate the Makefile to build the project. This file specifies the source, header, and UI files included in the project.
| CMakeLists.txt | ||
|---|---|---|
|
A brief explanation of the above file:
appinfo.json and icon.png files to the output folder.For more details, see CMake Reference Documentation.
You are now ready to build the native app. Perform the following steps:
Go to your project directory (com.sample.waylandegl).
Create a build directory and go to the directory.
$ mkdir BUILD
$ cd BUILD
Execute the cmake command. Then execute the make command. A pkg_<YOUR_ARCHITECTURE> directory will be created in your project folder (com.sample.waylandegl).
$ cmake ..
$ make
After building the native app, it must be packaged as an IPK file. Make sure the appinfo.json file is available, because it is required when packaging an external native app for webOS OSE.
To package the native app, use the ares-package command. The packaged file is generated in the current directory.
$ cd ..
$ ares-package pkg_arm64
In the above command, pkg_arm64 is the native app directory. You can use an absolute or relative path. Also, you can package the app with a service. For more details on using ares-package, see ares-package.
To install the native app on the target device, execute the following command:
$ ares-install ./com.sample.waylandegl_0.0.1_aarch64.ipk -d <TARGET_DEVICE>
In the above command:
<TARGET_DEVICE> is the name of the target device../com.sample.waylandegl_0.0.1_aarch64.ipk is the name of the IPK file that is generated after packaging the app in the previous step.If the installation is successful, a Success message will appear.
To verify the installation, check if the native app ID (in this case, com.sample.waylandegl) is available in the output of the following command:
$ ares-install --device <TARGET_DEVICE> --list
To remove the app from the device, use the ares-install command as follows:
$ ares-install --device <TARGET_DEVICE> --remove com.sample.waylandegl
To launch the native app using the CLI, execute the following command:
$ ares-launch --device <TARGET_DEVICE> com.sample.waylandegl
In the above command:
<TARGET_DEVICE> is the name of the target device. This is the same device on which the app was installed in the previous step.com.sample.waylandegl is the app ID that is available after installing the app.After executing the above command, check the target device to see if the app is running.
To close the app, use the ares-launch command as follows:
$ ares-launch --device <TARGET_DEVICE> --close com.sample.waylandegl
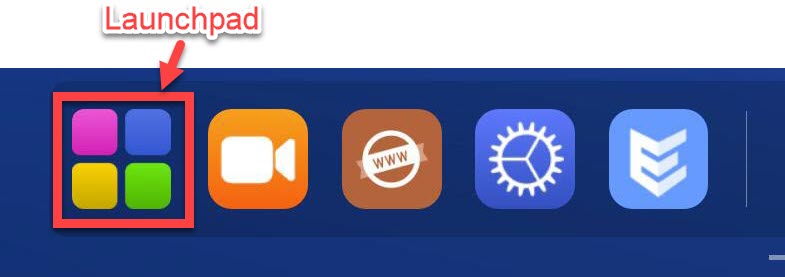
To launch the native app using the target device, you need to display the Launchpad first.
Drag the mouse cursor upward from the bottom of the screen (or swipe up from the bottom of the screen if you’re using a touch display).
Click the Launchpad icon.

After the Launchpad is displayed, click the app icon.
Contents