Advanced Kiosk - Face Recognition and Menu Recommendations
December 28, 2023
Author: Dahun Kim, Yeongjae Shin, Junseok Park, Seungwoon Lee, Donghyuk Shin
Overview
This project demonstrates how to develop a face recognition-based kiosk that recognizes the user’s face and provides customized menu recommendation and menu lists.
Key features are as follows:
User Registration
User Recognition
Customized Menu Recommendation
Order Placement
Note The primary language of this project is Korean.
Hardware Requirements
To set up this project, you need a target device and host PC.
Target Device
You need a Raspberry Pi 4 with webOS OSE as the target device.
webOS OSE 2.24.0 is used in this project. You can get the pre-built image in webOS OSE GitHub.
To install a webOS OSE image on a MicroSD card, use the following guide: Flashing webOS OSE.
Touchscreen or Monitor
The display device that interacts with the kiosk. We recommend using a touchscreen for a more interactive experience. We used SunFounder 10.1 Touchscreen.
# For Ubuntu and macOSsource <VIRTUAL ENVIRONMENT NAME>/bin/activate
# For Windows# Note that using backslash (\) in the path.\\<VIRTUAL ENVIRONMENT NAME>\Scripts\activate
Proceed the next step (Running the Server) in this virtual environment terminal.
On the host PC, enter the following command on your terminal to install CLI.
npm install -g @webosose/ares-cli
Turn on the target device. Make sure that the target device is connected to the internet and on the same network as the host PC.
Register your target device on CLI. Enter the following command.
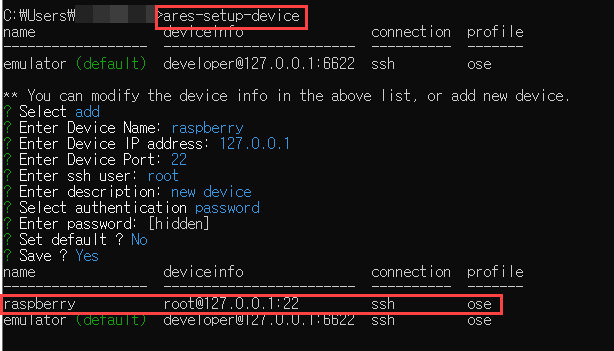
ares-setup-device
Then the interactive mode will be displayed.
name deviceinfo connection profile
------------------ ------------------------ ---------- -------
emulator (default) developer@127.0.0.1:6622 ssh ose
** You can modify the device info in the above list, or add new device.
? Select (Use arrow keys)> add
modify
remove
set default
Select add and fill in the other fields as follows:
Field
Description
Select
Select add mode.
Device name
This name will be used as an ID of your target device. We recommend using a short name.
IP address
IP address of your target device.
Port
Press the Enter key. Don’t change the default value (22).
SSH user
Press the Enter key. Don’t change the default value (root).
Description
Additional description for the target device. (You can skip this step by pressing the Enter key.)
Authentication
Select password.
Password
Password You can skip this step by pressing the Enter key.
Set default
This option sets your target device as the default device. Choose whatever you want.
Save
Enter Y to save this configurations.
Note For more details about ares-setup-device, refer to the CLI documentation.
If it succeeds, an app directory (<YOUR APP NAME>) will be generated under the current directory.
Open appinfo.json in the generated directory. And add allowVideoCapture, allowAudioCapture, and enableWebOSVDA as follows. These parameters allow camera permission on the target device.
Now, you ready to use the kiosk on the target device.
How to Use
Launching the Server and App
Connect a camera to the target device.
(Optional) If your host PC doesn’t have built-in camera, connect a camera to your host PC.
Check that the host PC and target device’s networks are working well.
Launch the server.
Launch the installed kiosk app.
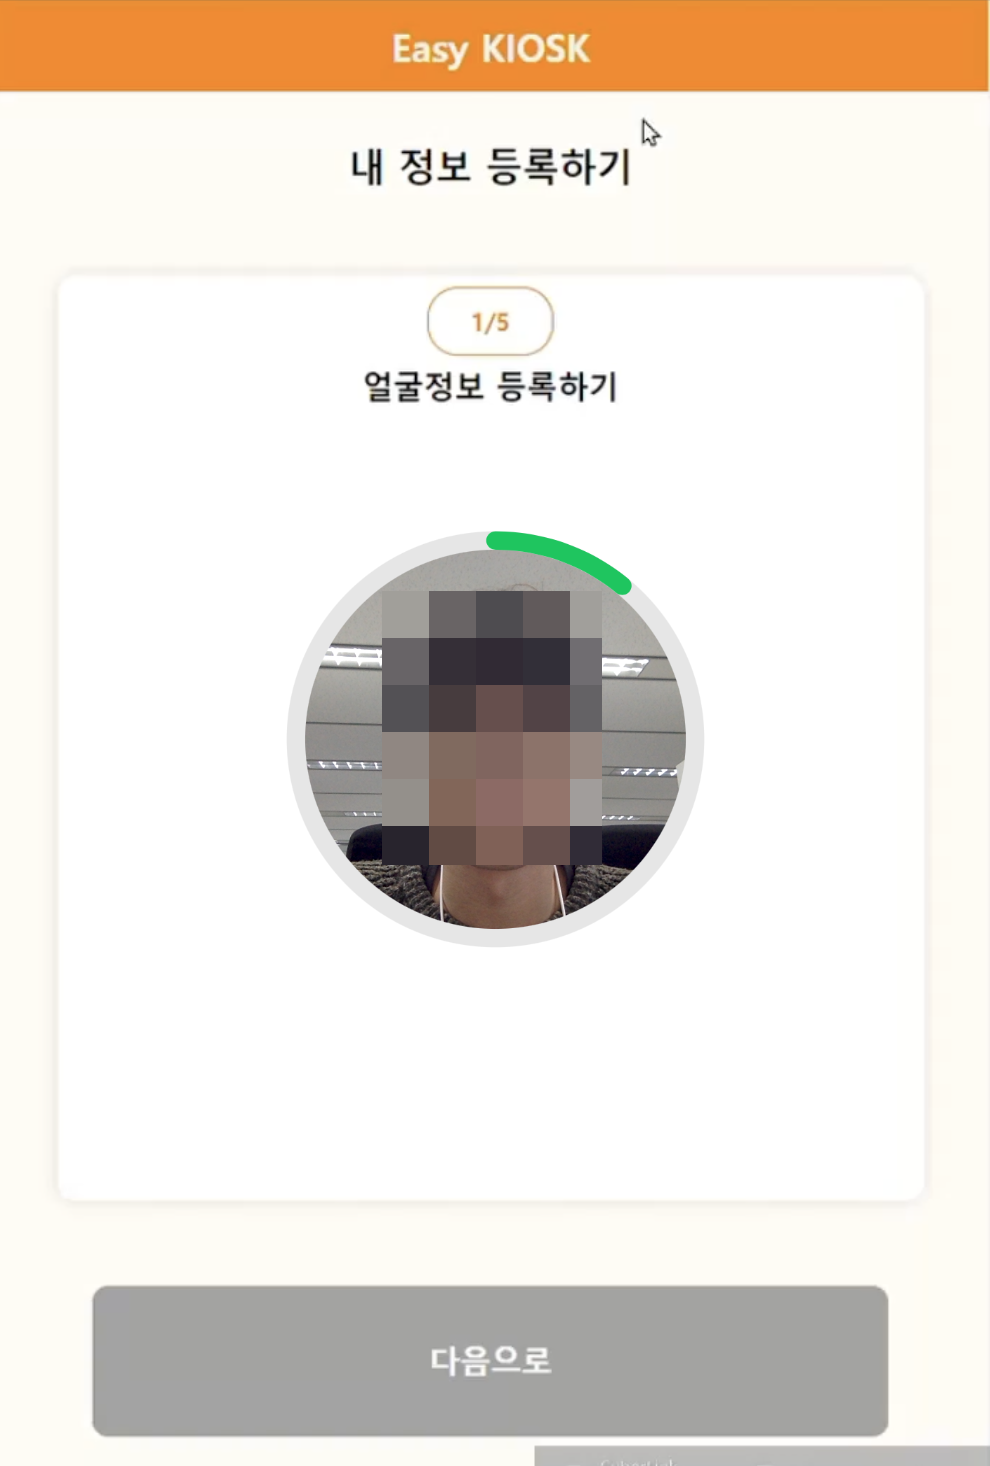
Creating an Account
To use the face recognition, you have to create an account and register information first.
(On the host PC) Go to the frontend/register directory and execute the following command.
npm start
A registration page will be launched on the browser.
After a while, face registeration process will start.
Caution
The face model is downloaded from the internet when you first register your face. We recommend re-launching the server after the download is complete.
You can check the download progress on the server terminal.
Enter your name.
Enter your phone number.
If you are a vegan, enable the checkbox and fill in the detailed type. And select your religion.
Select your allergens.
After you finish entering the allergen information, the face model will be downloaded. If it succeeds, you will see a completion page. If it failed, re-launch the server and registration page, and try it again.
Logging In and Placing an Order
Now, you can log in with your face or phone number.
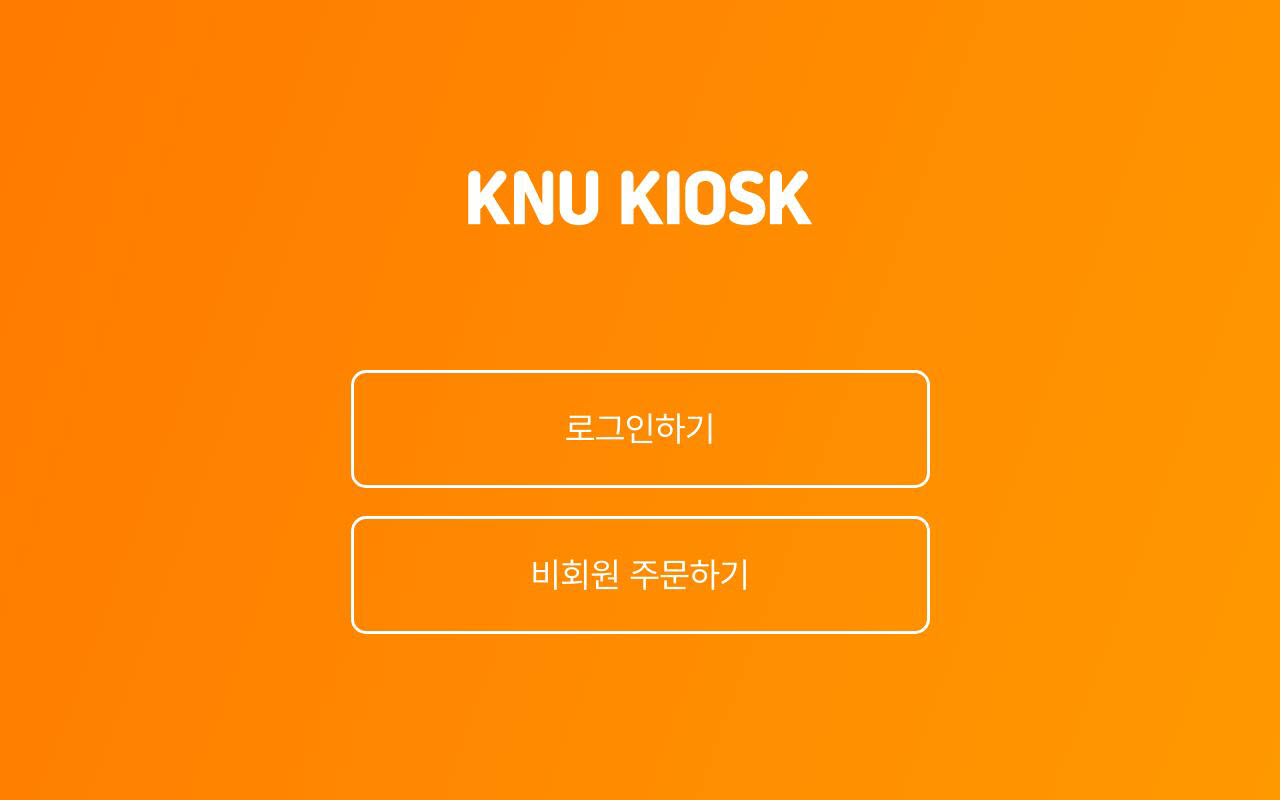
Go to the target device and launch the kiosk app.
If you click (or touch) the login button above, you will automatically attempt to log in with facial recognition.
During the face recognition process, you can log in with your phone number by pressing the button below.
defhomomorphic_filter(img):
try:
# Only the calculation for Y with YUV color space img_YUV = cv2.cvtColor(img, cv2.COLOR_BGR2YUV)
y = img_YUV[:, :, 0]
rows = y.shape[0]
cols = y.shape[1]
# Logs are taken to separate illumination elements and reflection elements imgLog = np.log1p(np.array(y, dtype='float') /255)
M =2* rows +1 N =2* cols +1# Generate gaussian mask, sigma = 10 sigma =10 (X, Y) = np.meshgrid(np.linspace(0, N -1, N), np.linspace(0, M -1, M))
Xc = np.ceil(N /2)
Yc = np.ceil(M /2)
gaussianNumerator = (X - Xc) **2+ (Y - Yc) **2# Create low pass filter and high pass filter LPF = np.exp(-gaussianNumerator / (2* sigma * sigma))
HPF =1- LPF
LPF_shift = np.fft.ifftshift(LPF.copy())
HPF_shift = np.fft.ifftshift(HPF.copy())
# The image covered with Log is FFTed and multiplied by LPF and HPF to divide the LF and HF components. img_FFT = np.fft.fft2(imgLog.copy(), (M, N))
img_LF = np.real(np.fft.ifft2(img_FFT.copy() * LPF_shift, (M, N)))
img_HF = np.real(np.fft.ifft2(img_FFT.copy() * HPF_shift, (M, N)))
# The lighting and reflection values are controlled by multiplying each LF and HF component by the scaling factor. gamma1 =0.3 gamma2 =0.7 img_adjusting = gamma1 * img_LF[0:rows, 0:cols] + gamma2 * img_HF[0:rows, 0:cols]
# The adjusted data is now made into an image through exp operations. img_exp = np.expm1(img_adjusting)
img_exp = (img_exp - np.min(img_exp)) / (np.max(img_exp) - np.min(img_exp))
img_out = np.array(255* img_exp, dtype='uint8')
# YUV replaces Y space with a filtered image and converts it to RGB space. img_YUV[:, :, 0] = img_out
result = cv2.cvtColor(img_YUV, cv2.COLOR_YUV2BGR)
return result
except:
pass
resize_with_padding()
This function adjusts the image size to the model target_size.
This function converts base64 string into embedding.
base64 -> image
image -> face
face -> embedding
backend/face_recognition/extractor.py
defextractor(base64):
try:
# 1. base64 -> image img = functions.loadBase64Img(base64)
# 2. image -> face (Face Area Extracted) face = DeepFace.extract_faces(img_path=img, target_size=target_size, detector_backend='ssd')[0]['facial_area']
x, y, w, h = face['x'], face['y'], face['w'], face['h']
face = img[y:y + h, x:x + w]
# Adjusting lighting face = homomorphic_filter(face)
# Resizing an image face = resize_with_padding(face, target_size)
# 3. face -> embedding embedding_img = DeepFace.represent(img_path=face, model_name=model_name, detector_backend='skip')[0]['embedding']
return embedding_img
except:
returnNone
backend/face_recognition/identification.py
findCosineDistance()
This function calculates the distance between a user’s face info and the embedding of the photo taken from the front using the cosine similarity.
backend/face_recognition/identification.py
deffindCosineDistance(db_list, target):
a = np.dot(db_list, target)
b = np.linalg.norm(db_list, axis=1)
c = np.sqrt(np.sum(np.multiply(target, target)))
return1- (a / (b * c))
identification()
This function returns the shortest distance between a user’s face info and the embedding of the photo taken from the front.
This function converts a base64 list received from the front into an embedding list.
backend/face_recognition/base2vector.py
defbase_to_vector(face_bases: list) ->list:
embedding_list = []
for base in face_bases:
# base64 -> embedding input_embedding = extractor(base)
if input_embedding isnotNone:
embedding_list.append(input_embedding)
return embedding_list
backend/face_recognition/checker.py
Input size must be specified according to Keras CNN model (150 x 150).
backend/face_recognition/checker.py
target_size = (150, 150)
model = load_model('./face_recognition/mask_model.h5')
isFace()
This function determines whether your face is well detected and whether you are wearing a mask.
backend/face_recognition/checker.py
defisFace(base64):
try:
# 1. base64 -> image img = functions.loadBase64Img(base64)
# 2. image -> face (Extracting Face Areas) face = DeepFace.extract_faces(img_path=img, target_size=target_size, detector_backend='ssd')[0]['facial_area']
x, y, w, h = face['x'], face['y'], face['w'], face['h']
face = img[y:y + h, x:x + w]
# Adjusting lighting face = homomorphic_filter(face)
# Resizing an image face = resize_with_padding(face, target_size)
# Image preprocessing face = face[:, :, ::-1]
face = face.astype(np.float64) /255.0# Determining whether or not to wear a mask face = np.expand_dims(face, axis=0)
value = model.predict(face)
print(value)
if value <=0.5:
returnFalseelse:
returnTrueexcept:
returnFalse
backend/login/views.py
post()
This function configures how facial recognition login works.
5 base64 files will be POSTed through frontend/register/src/Face.js.
Convert the files: base64 -> image -> embedding.
Get information of all users.
Calculate the face info distance between embedding and user.
Returns the user’s phone number whose distance was less than the threshold and the shortest distance.
backend/login/views.py
classFaceLoginView(APIView):
defpost(self,request):
# 1. 5 base64 files POST (list) via Front Face.jsif request.method =='POST':
try:
face_bases = request.data.get('imageData')
except:
return Response('')
# 2. base64 -> image -> vector target_embedding_list = base_to_vector(face_bases)
print("Received face data from front")
# 3. vector-> embedding embedding_array = np.array(target_embedding_list)
# 3. Get information from all users user_table = User.objects.all()
min_dist =1e9 phonenum =None name =Nonefor user in user_table:
try:
user_face_list = np.array(eval(user.user_face_info))
# 4. Calculate the vector and user's face info distance at number 2 distance =1e9for target in embedding_array:
distance =min(distance, identification(user_face_list, target))
#print(f"{user.user_name}: {distance}")if distance < min_dist:
min_dist = distance
# Pull only when the distance is lower than the threshold.if min_dist <=0.15:
phonenum = user.user_phonenum
name = user.user_name
except:
passif phonenum isnotNone:
print(f"Success\nname: {name}, phonenum: {phonenum}")
else:
print("None")
# 5. Returns the user's mobile phone number whose distance was below the threshold and the shortest distancereturn Response({"phone_number": phonenum, "name": name})
backend/signup/views.py
post()
This function checks if it is a proper face photo during the membership registration process.
backend/signup/views.py
classFaceCheckView(APIView):
defpost(self, request):
face_base = request.data.get('imageData')
# Face extractedif isFace(face_base):
print("No mask")
return Response({'result': True})
# Face not extractedelse:
print("mask")
return Response({'result': False}, status=400)
backend/menu/recommendation.py
get_recommended()
This function makes menu recommendations to users based on their past orders and the ingredients of the menu. This function will not recommend menus that the user is allergic to.
backend/menu/recommendation.py
defget_recommended(user_id):
# Menu and ingredients menus_db = Menu.objects.all()
# Importing User Instances user_instance = User.objects.get(user_phonenum = user_id)
try:
user_preprocessed_data = PreprocessedData.objects.get(user=user_instance)
exclude_ingredient_str = user_preprocessed_data.excluded_ingredients
except PreprocessedData.DoesNotExist:
exclude_ingredient_str =""# Process of changing String to Set# Split into commas after removing bracketsif exclude_ingredient_str =="empty":
excluded_ingredients =set()
else :
exclude_ingredient_list = exclude_ingredient_str[1:-1].split(',')
#String -> Create set after integer conversion excluded_ingredients =set(int(item.strip()) for item in exclude_ingredient_list)
menus = {}
for menu in menus_db:
ingredients = [ingredient.id for ingredient in menu.menu_ingredient.all()]
# Skip menus with excluded ingredientsifany(ingredient in excluded_ingredients for ingredient in ingredients):
continue ingredients_str =" ".join([ingredient.ingredient_name for ingredient in menu.menu_ingredient.all()])
menus[menu.menu_name] = ingredients_str
# Order data: {Order number: {'user': User ID, 'menus': [Order menu list]}} orders_db = Order.objects.filter(user=user_instance)
orders = {}
for order in orders_db:
ordered_items = Ordered_Item.objects.filter(order=order)
orders[order.order_num] = {'user': order.user.user_phonenum, 'menus': [item.menu.menu_name for item in ordered_items]}
# TF-IDF conversion vectorizer = TfidfVectorizer()
tfidf_matrix = vectorizer.fit_transform(menus.values())
tfidf_features = np.array(tfidf_matrix.todense())
# Calculate cosine similarity cosine_sim = cosine_similarity(tfidf_matrix, tfidf_matrix)
# Extract menus from a user's past orders past_orders = []
for order in orders.values():
if order['user'] == user_id:
past_orders.append(order['menus'])
past_menus = []
for order in past_orders:
for menu in order:
past_menus.append(menu) # ex) ["Salmon Salad", "Salmon Salad", "Psyburger", "Rice Noodles", and "Rice Noodles"] It comes out as "Salmon Salad", and the more you come out twice, the higher the weight.# Find menus similar to those ordered in the past similar_menus = np.zeros(len(menus))
for menu in past_menus:
index =list(menus.keys()).index(menu)
similar_menus += cosine_sim[index]
# Functions to obtain indexes for similarity calculationsdefget_index(menu):
menu_keys =list(menus.keys())
index = menu_keys.index(menu)
return similar_menus[index]
# Creating a Menu List menu_list =list(menus.keys())
# Sorts menus in order of high similarity sorted_menus = []
for menu in menu_list:
sorted_menus.append((menu, get_index(menu)))
sorted_menus.sort(key=lambda x: x[1], reverse=True)
# Extract only menu names sorted_menus = [menu[0] for menu in sorted_menus]
recommended_menus = []
for recom in sorted_menus:
this_menu = Menu.objects.get(menu_name=recom)
this_serial = MenuSerializer(this_menu)
recommended_menus.append(this_serial.data)
# Sort menus in order of high similarity# sorted_menus = sorted(list(menus.keys()), key=lambda x: similar_menus[list(menus.keys()).index(x)], reverse=True)# Previous orders are excluded from the recommendation list# recommended_menus = []# for menu in sorted_menus:# if menu not in past_menus:# recommended_menus.append(menu) recommended_menus = recommended_menus[0:3]
return recommended_menus